Menu

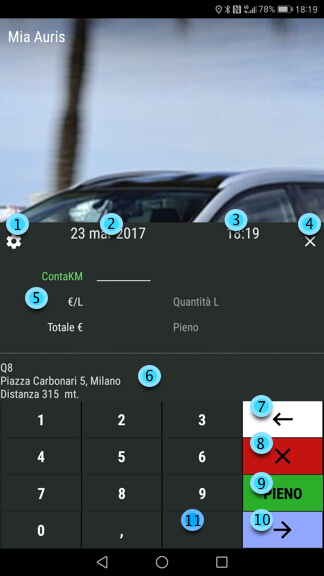
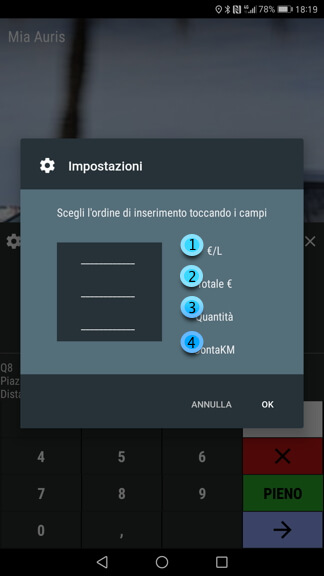
1.2.3.4. Touch and choose from the three input fields and their order. Tap the field again to eliminate the choice
I recommend this order:: 1 Odometer, 2 price for quantity e 3 Total.The first two can be placed even before making the refuelling, the last one can be entered at checkout reading the receipt. After refuelling, the receipt can be photographed to keep a history and to check the insertion accuracy even after some time.
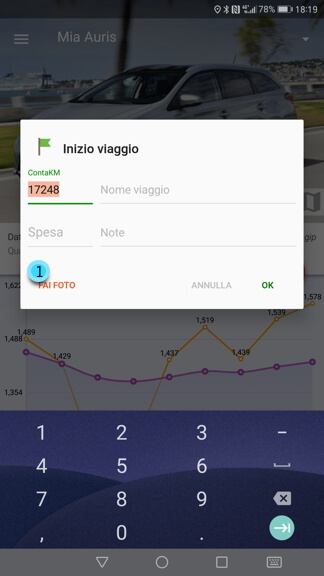
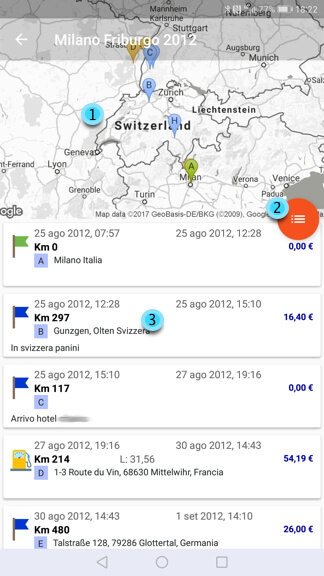
Enter the initial mileage (odometer), the name of the trip, any cost (optional) and a description (optional) Inserting the begin of journey, will appear the flags of stops (blue) and end of the trip (red). For any stops you can enter all expenses also not specific to the vehicle (restaurants, hotels ...) The refuellings done, will be automatically included in the trip until you insert the end of the trip.
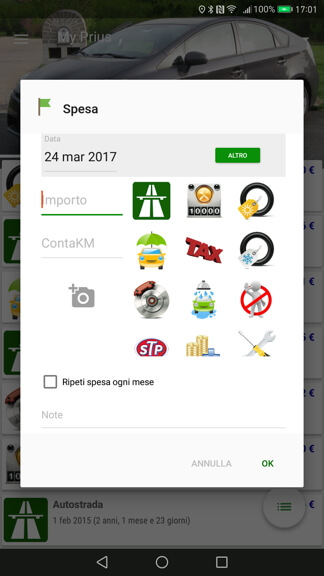
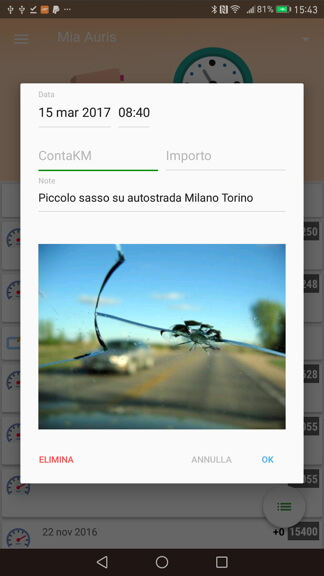
Tap the relevant expense. The icons are sorted according to their use. To search for a specific expense, press the 'other' green box where you can do a search. The only required field, besides the type of the spending, is the amount. For more accurate statistics, it is recommended to enter the mileage for all costs and spare parts that wear out, and on the coupons. Most important is to insert the mileage every time you change tires. Every cost can be combined with a photo of the document by pressing the icon of the camera or, by pressing for a long time, it is possible to choose from the internal memory. Selecting 'Repeat spending each month' appears, the spending will be repeated automatically. This is different from the notification as it is not notified spending but is inserted without any other intervention.
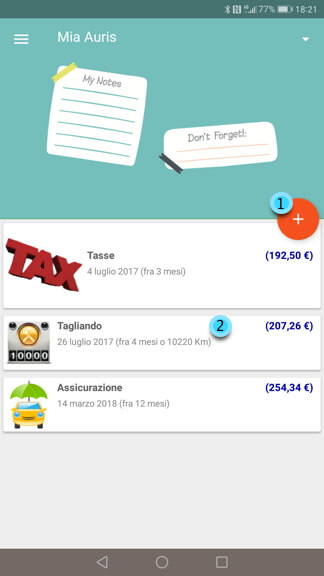
This feature lets you mark all memos related to the vehicle and be alerted at the right time. Each reminder can have a mileage or time expires. If both are set, you will be notified by the first of the two. Each mileage expiration is converted internally into a date based on the average daily mileage to warn well in advance. At the moment in which it actually inserts the maintenance or the cost, the relative maturity will be canceled.
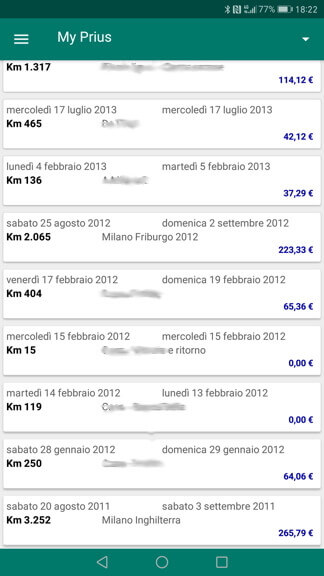
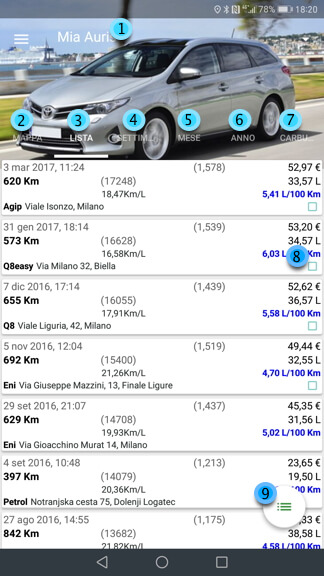
Here you see the list of included trips. For each trip presents the total expenditure, distance, name and date of beginning and end. By pressing on the round button, you can enter a voyage earlier. However, it is recommended to enter it through the home screen.
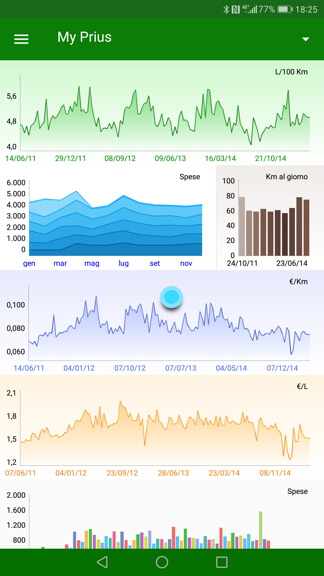
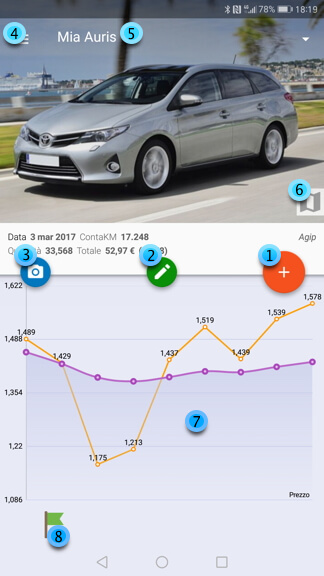
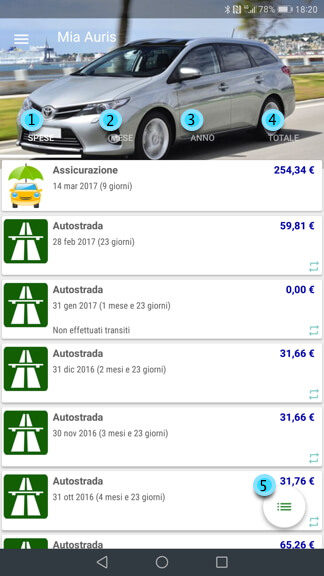
In a single screen you can be graphically control all aspects of the vehicle: consumption, costs, use and cost of the various fuels. Most of the graphics can be retrieved in order to be able to interact by setting the display periods or examine them in detail.
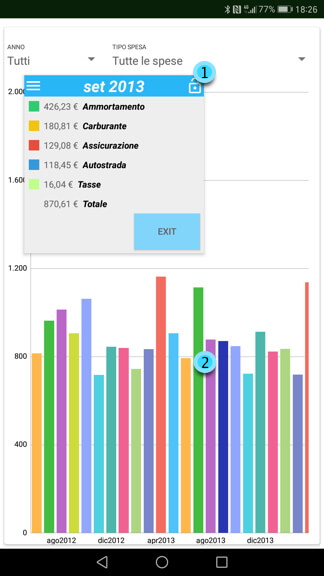
Here you see for example the expenses chart to see how it works. This graph can be enlarged in both horizontal and vertical directions so as to improve the view in detail. At the top there are the selectors for choosing the time and expense to display. if you have been spending more choices, touching a month bar (2) opens the detail (1). This window shows a list of the expenses of the month or can be moved by dragging it from anywhere or can be locked in the open position by touching the lock icon in the upper left. When the window is locked in the open position, tapping a bar of another period, another opens so you can compare multiple periods. They can also be blocked more than two windows. The open blocked windows can be dragged in order to facilitate the comparison by each other.
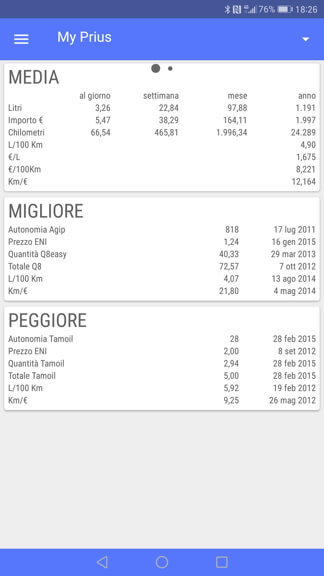
The Statistics screen presents statistical averages, best and worst of textually consumption. This screen is scorrrimento, is present to the left of the screen comparison between two vehicles (if present)
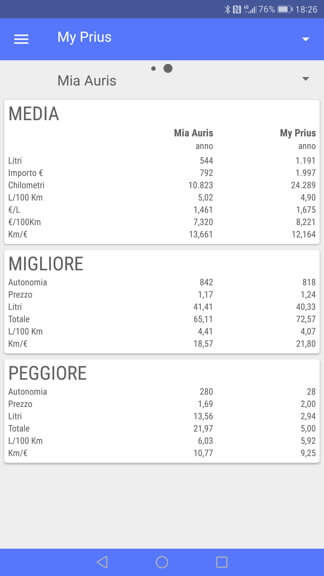
This screen shows a choice of two vehicles side by side in order to allow the Comparing consumption. The vehicles you can choose from the available vehicles using the two upper chooser
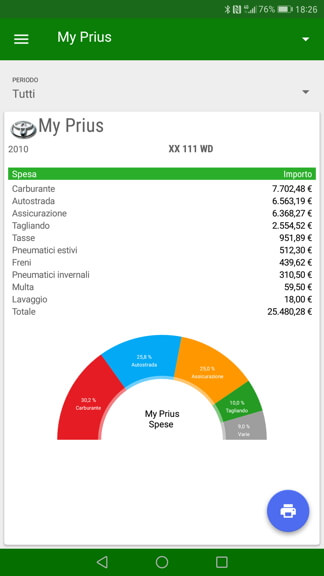
This report displays the expenses of a vehicle for a certain period. It can be printed in PDF including pie
Here you can record two types of data: the odometer diary and little notes.
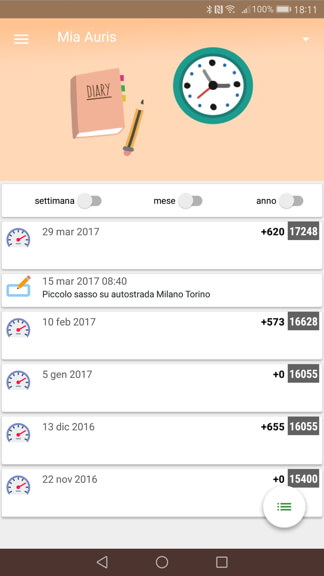
Useful if you have a rental car. It allows to keep updated the list of kilometers covered without needing to enter a supply or an expense. Exactly why it is disconnected from the master repository and is not subject to rules. The only care is to keep the odometer progressing. It can be adjusted to a given day and is regarded as the last day of registration. This function has three grouping selectors to see at a glance the weekly trend, monthly or yearly.
They are small notes that may be useful to remember something or to mark small interventions to be made short without having to necessarily enter an expense or maintenance. In addition to the description, a date (to order notes), the odometer (no checks) can be inserted must be set and the amount of spending. Although this file is not related to the main so all that is entered is treated as a text field.
callable functions via the round button:
Note sample
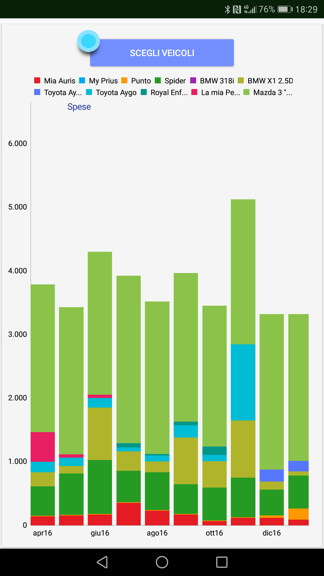
The combined graphics graphically displaying multiple vehicles so you can compare. For example this one shows the costs of more vehicles. The vehicles to be displayed can be selected with the blue button at the top
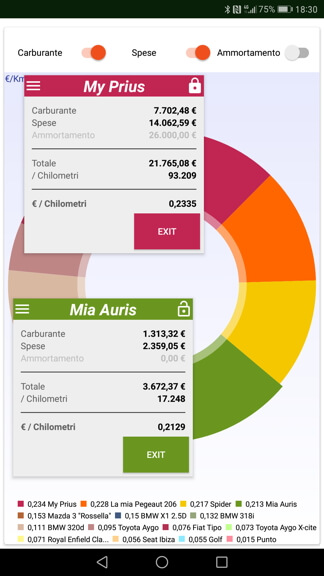
This graph shows the cost per distance unit for vehicles. You can select the type of expenditure to display - Fuel - Various costs - Amortization. Selecting a vehicle you can see the detail, blocking the open detail by means of the padlock on the right side you can be open another vehicle in order to have a direct comparison.
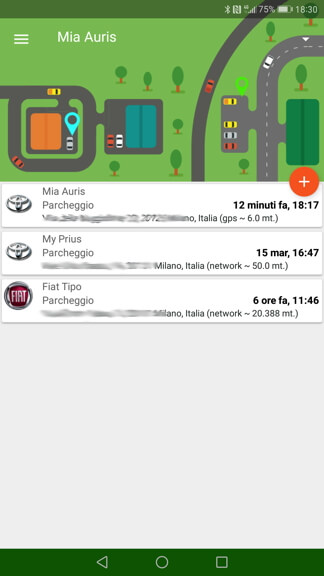
Lists the parking positions of all vehicles. The position can be determined automatically by means of the Bluetooth device (see vehicle management) or by pressing the button (+) at the time of the stop.
By choosing one of the vehicles, you will open the map where you can change the parking spot or delete the information.
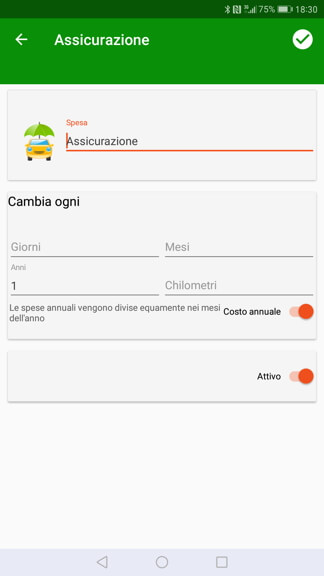
With this function you customize the types spending. It can be changed the name, the time of transmission (notification) and if it comes to spending as a cost to be shared throughout the year such as insurance or stamp.
The notification can be specified as either time or mileage (triggered what happens first). For example, the cutting might have a period of one year and a mileage of 20000km. If a guy spending is not used, this can be disabled.
The types spending are linked to the vehicle for which you can have such different maturity periods of the cutting for several vehicles.
They were included 5 customizable expense types and have a generic icon A, B, C, D, E. My advice is not to specialize too expenses partly because the graphics would be less readable.
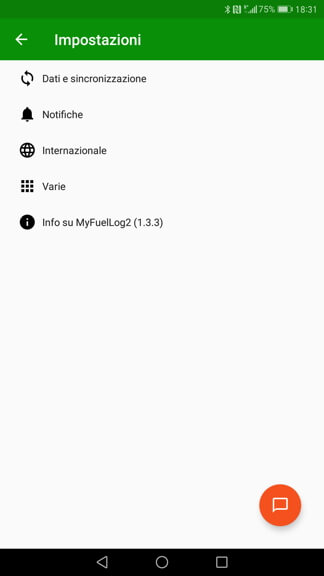
The settings are divided into data, and synchronization, notifications, International, Miscellaneous and info.
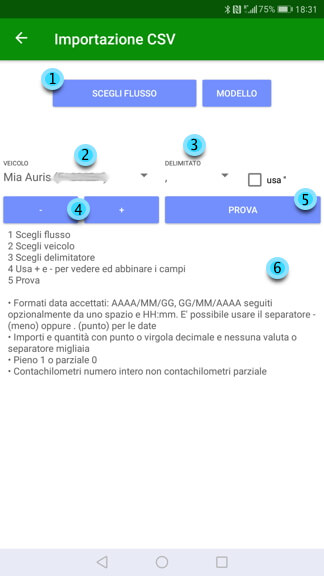
The CSV import is a rather complex function and is here explained in broad terms.
How to proceed?